Find the InfluxDB configuration file in /etc/influxdb/influxdb.conf and adjust the following line:
# Determines whether HTTP request logging is enabled.
log-enabled = falseMy personal knowledge base, online.
Content about system-management: installation, configuration, and maintenance.
Find the InfluxDB configuration file in /etc/influxdb/influxdb.conf and adjust the following line:
# Determines whether HTTP request logging is enabled.
log-enabled = falseIf you echo nothing to a file, it will clear the content to empty it. Just using sudo will not work, you need to be root!
sudo su
echo "" > logfileStop running containers using docker-compose and remove the containers.
docker-compose stop
docker rm docker_nginx_1
docker rm docker_connectivity_1
docker rm docker_gateway_1
docker rm docker_things_1
docker rm docker_concierge_1
docker rm docker_things-search_1
docker rm docker_policies_1
docker rm docker_mongodb_1
docker rm docker_swagger-ui_1
docker system prune -a
Download the latest Ditto zip from Github and re-run docker-compose.yaml.
This folder contains an example docker-compose.yml which can be used to start Eclipse Ditto with its backing Database – MongoDB – and a reverse proxy – nginx – in front of the HTTP and WebSocket API.
Source: https://github.com/eclipse/ditto/blob/master/deployment/docker/README.md
The nginx’s configuration is located in the nginx.conf file and contains a “Basic authentication” for accessing the HTTP and WebSocket API. The users for this sample authentication are configured in the nginx.httpasswd file also located in this directory.
In order to add a new entry to this file, use the “openssl passwd” tool to create a hashed password:
openssl passwd -quiet
 Password: <enter password>
 Verifying - Password: <enter password>
Append the printed hash in the nginx.httpasswd file placing the username who shall receive this password in front like this:
ditto:A6BgmB8IEtPTs
You may configure each service via passing variables to the java VM in the entrypoint section for each service.
...
# Alternative approach for configuration of the service
command: java -Dditto.gateway.authentication.devops.password=foobar -jar starter.jar
To get a list of available configuration options you may retrieve them from a running instance via:
# Substitute gateway with the service you are interested in
curl http://devops:foobar@localhost:8080/devops/config/gateway/?path=ditto
Or by going through the configuration files in this repository e.g. /services/gateway/starter/src/main/resources/gateway.conf.
docker-compose up -dCheck the logs after starting up:
docker-compose logs -fdocker-compose downCreate a folder, for example /app/dotnet6, and assign ownership to the right user:
sudo mkdir /app/dotnet6
sudo chown -R pi /app/
Download the .NET 6 SDK at Microsoft:
wget https://download.visualstudio.microsoft.com/download/pr/adcd9310-5072-4179-9b8b-16563b897995/15a7595966f488c74909e4a9273c0e24/dotnet-sdk-6.0.100-linux-arm64.tar.gzExtract the tar.gz file in the /app/dotnet6 directory:
sudo tar zxf dotnet-sdk-6.0.100-linux-arm64.tar.gz -C /app/dotnet6Test the .NET6 installation by browsing to the installation directory and execute the dotnet –info command:
cd /app/dotnet6
./dotnet --info
.NET SDK (reflecting any global.json):
 Version:   5.0.101
 Commit:    d05174dc5a

Runtime Environment:
 OS Name:     debian
 OS Version:  10
 OS Platform: Linux
 RID:         debian.10-arm64
 Base Path:   /app/dotnet/sdk/5.0.101/

Host (useful for support):
  Version: 5.0.1
  Commit:  b02e13abab

.NET SDKs installed:
  5.0.101 [/app/dotnet/sdk]

.NET runtimes installed:
  Microsoft.AspNetCore.App 5.0.1 [/app/dotnet/shared/Microsoft.AspNetCore.App]
  Microsoft.NETCore.App 5.0.1 [/app/dotnet/shared/Microsoft.NETCore.App]

To install additional .NET runtimes or SDKs:
https://aka.ms/dotnet-downloadLocate php.ini. For Debian this file is located in:
/etc/php/7.4/apache2Search for the following configuration lines (in nano use CTRL+W for search) and replace the existing configuration values with acceptable values.
max_execution_time = 60
memory_limit = 128M
post_max_size = 64M
upload_max_filesize = 64M
max_input_time = 60
file_uploads = On
safe_mode = Off
Locate .htaccess file in the root of your wordpress directory and add or adjust:
php_value upload_max_filesize 64M
php_value post_max_size 128M
php_value memory_limit 256M
php_value max_execution_time 300
php_value max_input_time 300
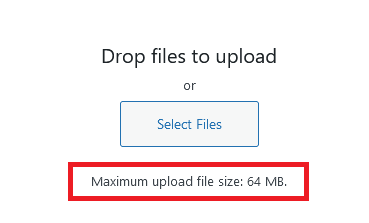
When you open the media library in WordPress and try to upload a file it should reflect the maximum configured upload file size:

Upgrading InfluxDB failed. For some reason the update caused permission issues with the start-up script:
usr/lib/influxdb/scripts/influxd-systemd-start.shWhen I gave this file permission to execute the InfluxDB service started again:
chmod +x /usr/lib/influxdb/scripts/influxd-systemd-start.shThen, the next problem appeared: systemctl didn’t recognise that the service was actually running: it was stuck in the state “activating”. Then I found an article on serverfault that described my problem.
I’m running InfluxDB on Debian so couldn’t apply the suggestion solution, but needed to interpret this a bit. I edited the file:
/etc/systemd/system/influxd.serviceI changed the type to simple, as indicated in this code sample:
[Unit]
Description=InfluxDB is an open-source, distributed, time series database
Documentation=https://docs.influxdata.com/influxdb/
After=network-online.target

[Service]
User=influxdb
Group=influxdb
LimitNOFILE=65536
EnvironmentFile=-/etc/default/influxdb
ExecStart=/usr/lib/influxdb/scripts/influxd-systemd-start.sh
KillMode=control-group
Restart=on-failure
Type=simple
PIDFile=/var/lib/influxdb/influxd.pid

[Install]
WantedBy=multi-user.target
Alias=influxd.serviceToday, one of my virtual systems ran out of disk space. To find the root cause I needed to find the directory that was filling up. Using the right parameters, the du command returns a list of directories and their disk space consumption.
du -hc --max-depth=0 /varFor example:
root@DB152:/# du -hc --max-depth 1 /var
704K    /var/tmp
4.0K    /var/mail
23M     /var/log
1.1M    /var/backups
4.0K    /var/local
3.2G    /var/lib
20K     /var/spool
734M    /var/cache
4.0K    /var/opt
3.9G    /var
3.9G    total
Removing files of a certain type recursively:
find . -name "*json.log" -type f -deleteClearing (system) log files:
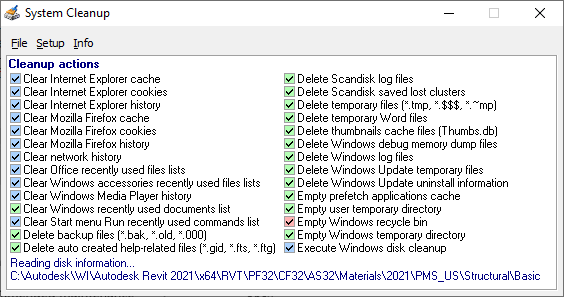
truncate /var/log/* --size 0Windows 10 can be quite hungry when it comes to disk space, especially when the system has been used for several years and has been updated several times. In some situations temporary update files are “stuck” in the C:\Windows\WinSXS directory, which at that time can consume up to 17Gb of disk space. Microsoft has published an article describing the process to clean up this directory in more detail. However, this doesn’t always work as described.
I recommend you to do the following:
Dism.exe /online /Cleanup-Image /StartComponentCleanup /ResetBase
Dism /Online /Cleanup-Image /RestoreHealth

These steps helps helped me to free up roughly 12Gb of storage space on a small little tables that only had a 32Gb drive. Its users can now enjoy using it again for the occasional e-mail and card game, without worrying about a lack of disk space and, as a result, missing important security updates.