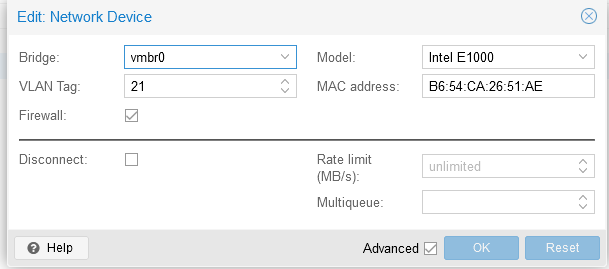
Ensure the /etc/hosts files are equal on all three the machines:
192.168.20.218 K8S01.verhaeg.local K8S01
192.168.20.219 K8S02.verhaeg.local K8S02
192.168.20.220 K8S03.verhaeg.local K8S03
Disable swap:
systemctl --type swap

  UNIT          LOAD   ACTIVE SUB    DESCRIPTION
  dev-sda3.swap loaded active active Swap Partition

systemctl mask dev-sda3.swap
sed -i '/ swap / s/^\(.*\)$/#\1/g' /etc/fstab
reboot
Prepare the installation of containerd:
cat <<EOF | tee /etc/modules-load.d/containerd.conf
overlay
br_netfilter
EOF

modprobe overlay && modprobe br_netfilter

cat <<EOF | tee /etc/sysctl.d/99-kubernetes-k8s.conf
net.bridge.bridge-nf-call-iptables = 1
net.ipv4.ip_forward = 1
net.bridge.bridge-nf-call-ip6tables = 1
EOF
Install containerd:
apt-get update && apt-get install containerd -y
Configure contianerd so that it works with Kubernetes:
containerd config default | tee /etc/containerd/config.toml >/dev/null 2>&1
Both the kubelet and the underlying container runtime need to interface with control groups to enforce resource management for pods and containers and set resources such as cpu/memory requests and limits. To interface with control groups, the kubelet and the container runtime need to use a cgroup driver. Set cgroupdriver to systemd (true) on all the nodes:
nano /etc/containerd/config.toml

[plugins."io.containerd.grpc.v1.cri".containerd.runtimes.runc.options]
BinaryName = ""
CriuImagePath = ""
CriuPath = ""
CriuWorkPath = ""
IoGid = 0
IoUid = 0
NoNewKeyring = false
NoPivotRoot = false
Root = ""
ShimCgroup = ""
SystemdCgroup = true
Restart and enable containerd on all nodes:
systemctl restart containerd && systemctl enable containerd
Add Kubernetes apt repository:
apt-get install curl pgp -y
echo "deb [signed-by=/etc/apt/keyrings/kubernetes-apt-keyring.gpg] https://pkgs.k8s.io/core:/stable:/v1.28/deb/ /" | tee /etc/apt/sources.list.d/kubernetes.list
curl -fsSL https://pkgs.k8s.io/core:/stable:/v1.28/deb/Release.key | gpg --dearmor -o /etc/apt/keyrings/kubernetes-apt-keyring.gpg
Install Kubernetes tools:
apt-get update && apt-get install kubelet kubeadm kubectl -y && apt-mark hold kubelet kubeadm kubectl
Install Kubernetes cluster with Kubeadm. Kubelet doesn’t appreciate the command-line options anymore (these are deprecated). Instead, I suggest to create a configuration file, say ‘kubelet.yaml’ with following content.
Create the kubelet.yaml file on the master node (K8S01):
nano kubelet.yaml

apiVersion: kubeadm.k8s.io/v1beta3
kind: InitConfiguration
---
apiVersion: kubeadm.k8s.io/v1beta3
kind: ClusterConfiguration
kubernetesVersion: "1.30.0" # Replace with your desired version
controlPlaneEndpoint: "K8S01"
---
apiVersion: kubelet.config.k8s.io/v1beta1
kind: KubeletConfiguration
Initialise the cluster:
kubeadm init --config kubelet.yaml --upload-certs
Result:
Your Kubernetes control-plane has initialized successfully!

To start using your cluster, you need to run the following as a regular user:

  mkdir -p $HOME/.kube
  sudo cp -i /etc/kubernetes/admin.conf $HOME/.kube/config
  sudo chown $(id -u):$(id -g) $HOME/.kube/config

Alternatively, if you are the root user, you can run:

  export KUBECONFIG=/etc/kubernetes/admin.conf

You should now deploy a pod network to the cluster.
Run "kubectl apply -f [podnetwork].yaml" with one of the options listed at:
  https://kubernetes.io/docs/concepts/cluster-administration/addons/

You can now join any number of the control-plane node running the following command on each as root:

  kubeadm join k8s01.verhaeg.local:6443 --token 965cpz.xvmun07kjrezlzg9 \
        --discovery-token-ca-cert-hash sha256:3ea38e43e5304e0124e55cd5b3fb00937026a2b53bc9d930b6c2dab95482225a \
        --control-plane --certificate-key e48ada5b6340b8e217bcf4c7c5427ae245704be43eee46c07bfa0b6e1c4abdd8

Please note that the certificate-key gives access to cluster sensitive data, keep it secret!
As a safeguard, uploaded-certs will be deleted in two hours; If necessary, you can use
"kubeadm init phase upload-certs --upload-certs" to reload certs afterward.

Then you can join any number of worker nodes by running the following on each as root:

kubeadm join k8s01.verhaeg.local:6443 --token 965cpz.xvmun07kjrezlzg9 \
        --discovery-token-ca-cert-hash sha256:3ea38e43e5304e0124e55cd5b3fb00937026a2b53bc9d930b6c2dab95482225a
To start interacting with cluster, run following commands on master node,
mkdir -p $HOME/.kube
cp -i /etc/kubernetes/admin.conf $HOME/.kube/config
chown $(id -u):$(id -g) $HOME/.kube/config
Let the other nodes join the cluster:
kubeadm join k8s01.verhaeg.local:6443 --token bcd2xw.32pzfgroijg1sax3 \
        --discovery-token-ca-cert-hash sha256:0c0f18cf32bc2342024efce9313e0e4fcf8a2b87275fd33e9ceb853d77b41f8b \
        --control-plane
Result:
root@K8S01:~# kubectl get nodes
NAME    STATUS     ROLES           AGE   VERSION
k8s01   NotReady   control-plane   62s   v1.28.11
k8s02   NotReady   <none>          26s   v1.28.11
k8s03   NotReady   <none>          21s   v1.28.11
Install Calico (container networking and security):
kubectl apply -f https://raw.githubusercontent.com/projectcalico/calico/v3.26.1/manifests/calico.yaml


