Backup and restore ArangoDB data

You can easily back-up and restore the ArangoDB database from Windows. All you need is WinSCP, Putty, and some diskspace. I’m running the batch script below every time I login to my workstation automatically to backup the configuration database:

plink -batch -pw xxx -t root@1.1.1.1 "systemctl stop arangodb3"
plink -batch -pw xxx -t root@1.1.1.1 "cd /data/backup && zip -r arangodb.zip /data/arangodb/data"
plink -batch -pw xxx -t root@1.1.1.1 "systemctl start arangodb3"
pscp -pw xxx -v -r root@1.1.1.1:/data/backup/arangodb.zip  G:\IoT\ArangoDB\arangodb.zip
plink -batch -pw xxx -t root@1.1.1.1 "rm /data/backup/arangodb.zip"

You can restore the database by installing ArangoDB on another system and copying the data back into the correct directory. Make sure you stop the ArangoDB service before you restore the data.

When the ArangoDB version on the target system is newer then the ArangoDB version on the source system you need to upgrade the database first. Stop the ArangoDB service and start it in the console with the –database.auto-upgrade parameter:

systemctl stop arangodb
/usr/sbin/arangod --uid arangodb --gid arangodb --pid-file /var/run/arangodb3/arangod.pid --temp.path /var/tmp/arangodb3 --log.foreground-tty true --database.auto-upgrade

Install ArangoDB on Debian

Installation

curl -OL https://download.arangodb.com/arangodb37/DEBIAN/Release.key 
sudo apt-key add - < Release.key 
echo 'deb https://download.arangodb.com/arangodb38/DEBIAN/ /' | sudo tee /etc/apt/sources.list.d/arangodb.list
sudo apt-get update 
sudo apt-get install arangodb3

Change database directory

Change the database directory in: /etc/arangodb3/arangod.conf

[database] 
directory = /data/arangodb/data

Ensure the arangodb has access rights to this directory: /etc/systemd/system/arangodb3.service

chown -R arangodb:arangodb /data/arangodb
chmod 700 /data/arangodb

Change endpoint and secure connection

ArangoDB configuration file location: /etc/arangodb3/arangod.conf

endpoint = ssl://0.0.0.0:8530 
[ssl] 
keyfile = /var/lib/arangodb3/server.pem

Generate the server certificate:

# create private key in file "server.key" 
openssl genpkey -out /var/lib/arangodb3/server.key -algorithm RSA -pkeyopt rsa_keygen_bits:2048 -aes-128-cbc 

# create certificate signing request (csr) in file "server.csr" 
openssl req -new -key /var/lib/arangodb3/server.key -out /var/lib/arangodb3/server.csr 

# copy away original private key to "server.key.org" 
cp /var/lib/arangodb3/server.key /var/lib/arangodb3/server.key.org 

# remove passphrase from the private key 
openssl rsa -in /var/lib/arangodb3/server.key.org -out /var/lib/arangodb3/server.key 

# sign the csr with the key, creates certificate PEM file "server.crt" 
openssl x509 -req -days 10000 -in /var/lib/arangodb3/server.csr -signkey /var/lib/arangodb3/server.key -out /var/lib/arangodb3/server.crt 

# combine certificate and key into single PEM file "server.pem" 
cat /var/lib/arangodb3/server.crt /var/lib/arangodb3/server.key > /var/lib/arangodb3/server.pem

Webinterface

https://x.x.x.x:8530/

Login with the specified root password.

Installing the UniFi Network Application on Raspberry Pi

Unfortunately MongoDB does not have an ARM64 bit package for Raspberry Pi yet, so I’m installing this on a Raspberry Pi with a 32-bit (Debian-based) Raspberry Pi OS:

sudo apt update && sudo apt full-upgrade -y && sudo apt autoremove -y && sudo apt-get autoclean -y
sudo apt install openjdk-8-jre-headless jsvc libcommons-daemon-java -y
sudo apt install haveged -y
sudo apt install mongodb-server mongodb-clients -y

echo 'deb https://www.ui.com/downloads/unifi/debian stable ubiquiti' | sudo tee /etc/apt/sources.list.d/100-ubnt-unifi.list
sudo wget -O /etc/apt/trusted.gpg.d/unifi-repo.gpg https://dl.ui.com/unifi/unifi-repo.gpg
sudo apt update && sudo apt install unifi -y

Go to your UniFi Controller via the IP address and port, for example: https://10.1.0.5:8443

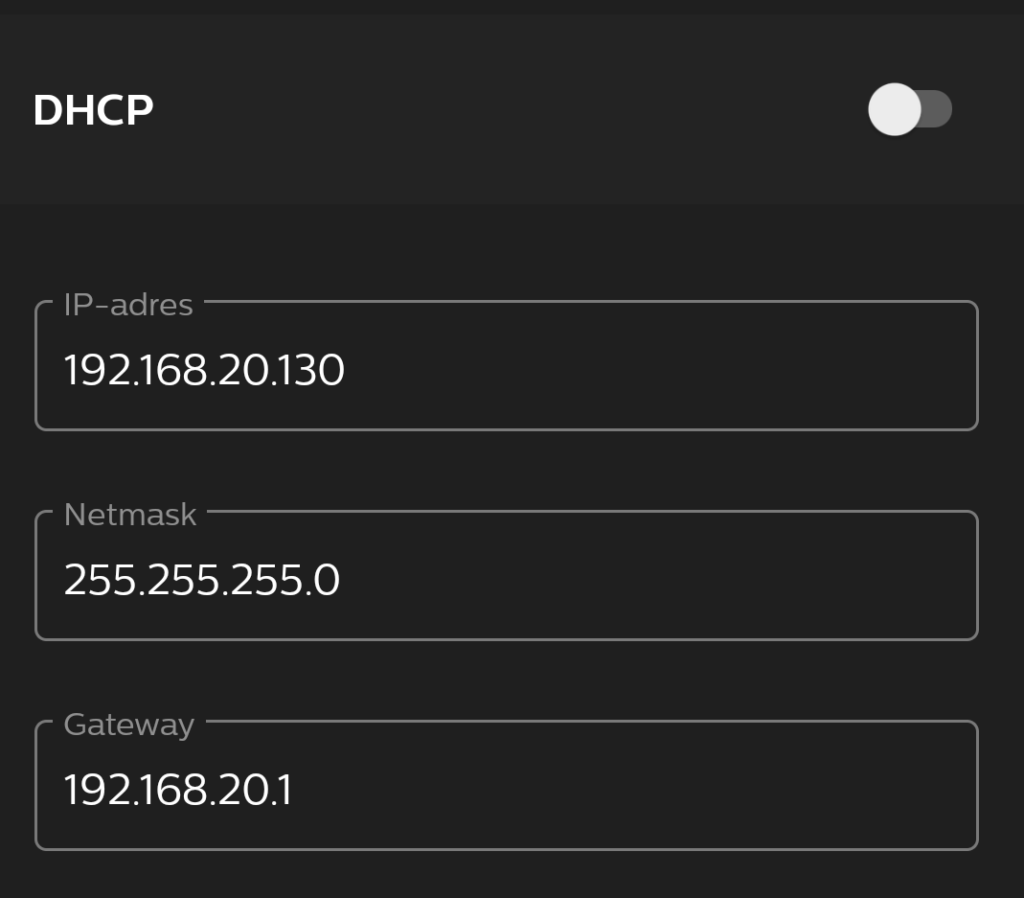
Configure a fixed IP address on a Hue Bridge

To configure a fixed IP address on the HUE bridge, you need to browse to the bridge using:

http://x.x.x.x/api/[bridge-user]/config

Use a HTTP PUT command to configure the IP address and use as body:

{ "ipaddress":"[new-ip]", "dhcp":false, "netmask": "[network-netmask]", "gateway": "[network-gateway]" }

Alternatively, you can use the HUE app and change the network settings in the bridge configuration.

Screenshot of the fixed IP address configuration in the Hue app.

Updating Eclipse Ditto

Stop running containers using docker-compose and remove the containers.

docker-compose stop
docker rm docker_nginx_1
docker rm docker_connectivity_1
docker rm docker_gateway_1 
docker rm docker_things_1 
docker rm docker_concierge_1 
docker rm docker_things-search_1
docker rm docker_policies_1
docker rm docker_mongodb_1
docker rm docker_swagger-ui_1 
docker system prune -a

Download the latest Ditto zip from Github and re-run docker-compose.yaml.

This folder contains an example docker-compose.yml which can be used to start Eclipse Ditto with its backing Database – MongoDB – and a reverse proxy – nginx – in front of the HTTP and WebSocket API.

Eclipse Ditto :: Docker

Source: https://github.com/eclipse/ditto/blob/master/deployment/docker/README.md

Configure nginx

The nginx’s configuration is located in the nginx.conf file and contains a “Basic authentication” for accessing the HTTP and WebSocket API. The users for this sample authentication are configured in the nginx.httpasswd file also located in this directory.

In order to add a new entry to this file, use the “openssl passwd” tool to create a hashed password:

openssl passwd -quiet
 Password: <enter password>
 Verifying - Password: <enter password>

Append the printed hash in the nginx.httpasswd file placing the username who shall receive this password in front like this:

ditto:A6BgmB8IEtPTs

Configuration of the services

You may configure each service via passing variables to the java VM in the entrypoint section for each service.

...
# Alternative approach for configuration of the service
command: java -Dditto.gateway.authentication.devops.password=foobar -jar starter.jar

To get a list of available configuration options you may retrieve them from a running instance via:

# Substitute gateway with the service you are interested in
curl http://devops:foobar@localhost:8080/devops/config/gateway/?path=ditto

Or by going through the configuration files in this repository e.g. /services/gateway/starter/src/main/resources/gateway.conf.

Start Eclipse Ditto

docker-compose up -d

Check the logs after starting up:

docker-compose logs -f

Stop Eclipse Ditto

docker-compose down