Adjusting the configuration of the RFRobot SEN0395

Manual: SEN0395 Manual

Connect to the device using a serial port (115200 baud rate, 1 stop bit, 8 data bits, no parity bit, no flow control):

cu -l /dev/ttyS0 -s 115200

The sensor should start showing information on the screen:

The 0 should change into 1 when the sensor detects human presence.

Send the sensorstop command to stop the sensor and enter the configuration mode:

$JYBSS,0, , , *
sensorStop
Done
leapMMW:/>

Adjusting sensitivity

This seems to be possible, but I cannot find any documentation on the related commands.

Adjusting range

Table source: SEN0395 manual

ExampleCommand
(Default configuration) Sensing distance: “0m to 3m”
(0m=0 * 0.15cm, 3m=20 * 0.15cm)
detRangeCfg -1 0 20
Sensing distance: “1.5m to 3m”
(1.5m=10 * 0.15cm, 3m=20 * 0.15cm)
detRangeCfg -1 10 20
Sensing distance: “1.5m to 3m” “7.5m to 12m”
(1.5m=10 * 0.15cm, 3m=20*0.15cm)
(7.5m=50 * 0.15cm, 12m=80 * 0.15cm)
detRangeCfg -1 10 20 50 80
Sensing distance: “1.5m to 3m” “7.5m to 12m” “13.5m to 15m”
(1.5m=10 * 0.15cm, 3m=20 * 0.15cm)
(7.5m=50 * 0.15cm, 12m=80 * 0.15cm)
(13.5m=90 * 0.15cm, 15m=100 * 0.15cm)
detRangeCfg -1 10 20 50 80 90 100
Sensing distance: “1.5m to 3m” “7.5m to 12m” “13.5m to 15m” “15.75m to 16.5m”
(1.5m=10 * 0.15cm, 3m=20 * 0.15cm)
(7.5m=50 * 0.15cm, 12m=80 * 0.15cm)
(13.5m=90 * 0.15cm, 15m=100 * 0.15cm)
(15.75m=105 * 0.15cm, 16.5m=110 * 0.15cm)
detRangeCfg -1 10 20 50 80 90 100 105 110

Save configuration

saveCfg 0x45670123 0xCDEF89AB 0x956128C6 0xDF54AC89

(Re)start sensor operations

sensorStart

Configuration

Entrance: detRangeCfg -1 0 12

Upstairs: detRangeCfg -1 . .

Technical architecture of my digital home

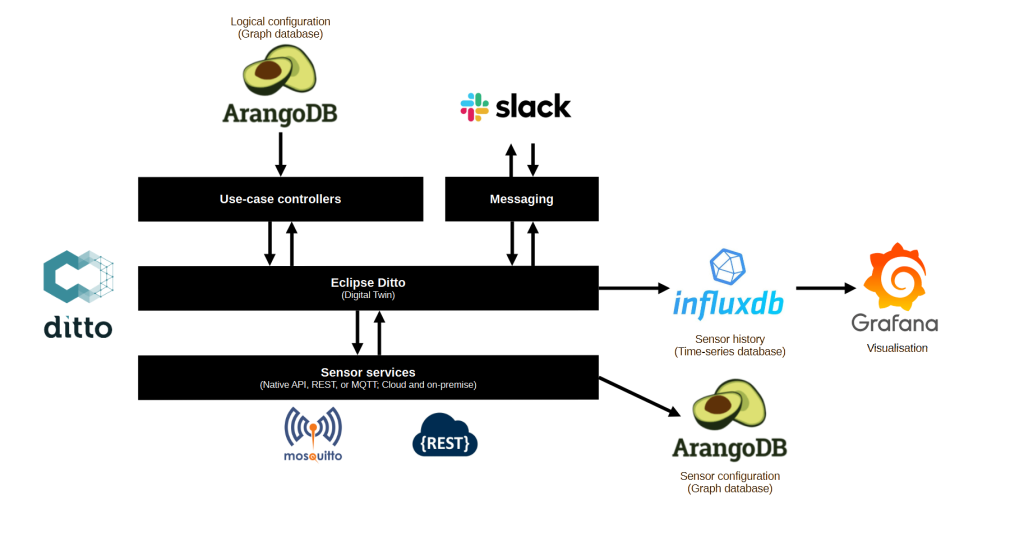
This article describes the components that build up the architecture of my (digital) home.

  • Logical configuration (ArangoDB): the logical configuration includes the areas (rooms) in the house, the sensors and actors located in those areas, and the “scenes” that can be applied to actors and areas.
  • Use-case controllers (custom .NET Core worker services): I’ve build a separate micro service for each use-case, for example, controlling lights, planning washer, dishwasher, and dryer, and planning the generation of domestic hot water.
  • Digital Twin (Eclipse Ditto): the Digital Twin stores the state of all connected sensors and is used by the use-case controllers to consume sensor states or push commands back down to the sensors.
  • Messaging (Slack): I’m using Slack as a messaging service to interact with my home. Slack informs me on specific state changes in the Digital Twin and I can feed commands in Slack to influence the behavior of my home. I try to minimize this as most decisions should be fully automated.
  • Sensor services (custom .NET Core worker services): the sensor services read sensor states via open or proprietary protocols. They are also responsible for pushing commands down to actors.
  • Sensor history (InfuxDB): InfluxDB stores the (relevant) history of the Digital Twin as well as the history from the different energy services that feed directly into InfluxDB.
  • Sensor configuration (ArangoDB): ArangoDB stores the information needed to communicate with local and cloud-based sensors.
  • Visualisation (Grafana): I’m using Grafana as a visualisation front-end.
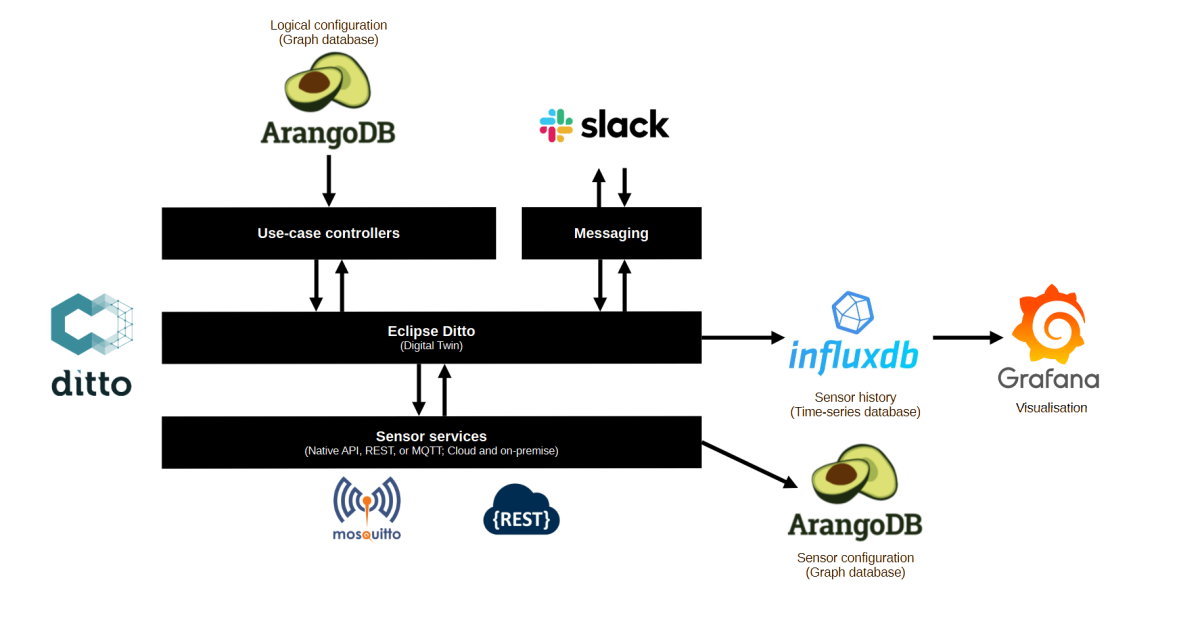
Visualization of the architecture of my digital home.

Installing Eclipse Ditto

Download Ditto from Github and unzip it in your favorite directory:

cd /data/install
wget https://github.com/eclipse/ditto/archive/master.zip
unzip master.zip

Adjust the nginx password:

openssl passwd -quiet
 Password: <enter password>
 Verifying - Password: <enter password>

Append the printed hash in the nginx.httpasswd (in the same folder as docker-compose.yml) file placing the username who shall receive this password in front like this:

ditto:A6BgmB8IEtPTs

Configure the docker data directory in /etc/docker/deamon.json:

{
   "data-root": "/data/docker"
}

And finally, install Ditto using the Docker compose script:

cd ditto-master/deployment/docker/
docker-compose up -d

To automatically start Ditto at system start, and clean up the related log-files and the following two lines to crontab:

crontab -e

@reboot sleep 30 && cd /data/docker && find . -name "*json.log" -type f -delete
@reboot sleep 60 && cd /data/install/ditto-master/deployment/docker && sudo docker-compose up -d

Done!

Updating Eclipse Ditto

First, kill all docker containers. Then remove them, and remove their related images:

docker kill $(docker ps -q) && docker rm $(docker ps -a -q) && docker rmi $(docker images -q)

Then we get the latest version of the docker-compose from GitHub:

wget https://github.com/eclipse/ditto/archive/refs/heads/master.zip
unzip master.zip

Unzip it, browse to the right directory, and start it:

cd master/deployment/docker
docker-compose up -d

Don’t forget to adjust the password:

openssl passwd -quiet
 Password: <enter password>
 Verifying - Password: <enter password>

Append the printed hash in the nginx.httpasswd (in the same folder as docker-compose.yml) file placing the username who shall receive this password in front like this:

ditto:A6BgmB8IEtPTs

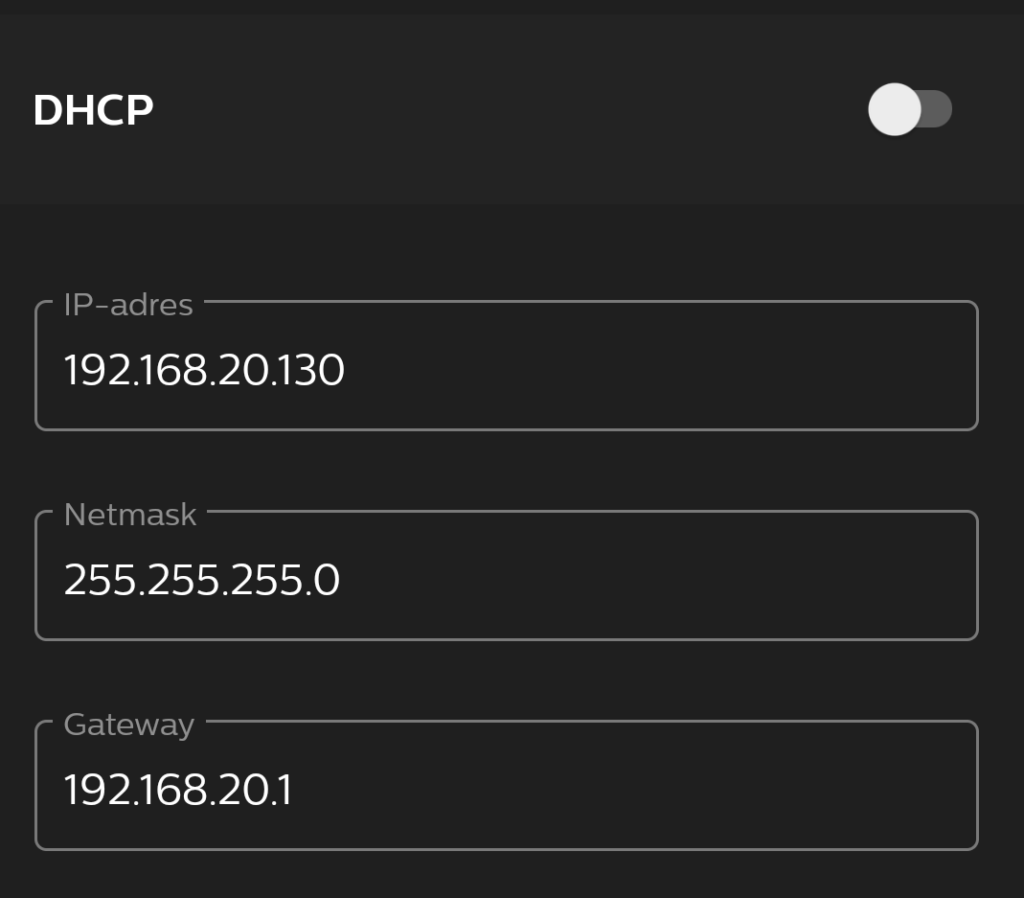
Configure a fixed IP address on a Hue Bridge

To configure a fixed IP address on the HUE bridge, you need to browse to the bridge using:

http://x.x.x.x/api/[bridge-user]/config

Use a HTTP PUT command to configure the IP address and use as body:

{ "ipaddress":"[new-ip]", "dhcp":false, "netmask": "[network-netmask]", "gateway": "[network-gateway]" }

Alternatively, you can use the HUE app and change the network settings in the bridge configuration.

Screenshot of the fixed IP address configuration in the Hue app.